.png?width=210&height=40&name=bleu%20et%20gris_Sigle+logo%20SBO%20(4).png)
Summary

- Real-time tracking Automatically notify your customers of each step of their order.
- Customization Send personalized emails based on order status and destination.
- Automation : Let Shippingbo handle sending your notifications and invoices, reducing the manual workload.
2. Prerequisites✔️:
- Accessible functionality for all Shippingbo packs.
3. How does the order status change notification work?
This feature automatically sends an email notification to your customer whenever the order status changes. The contact information used for sending the notification (email and phone number) is taken by default from the order's billing address. If this address is unavailable, the shipping address is used.
Example :
A customer places an order, and as soon as its status is changed to "shipped", a notification is sent to their email address specified in the order.
4. Enable status change notifications on your account
- Access Configurations → Notifications and labels → Status notifications and click on Create a notification :
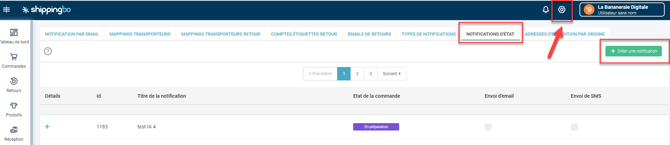
- In the pop-up window, enter a title and select the order status for which you want to trigger the notification:
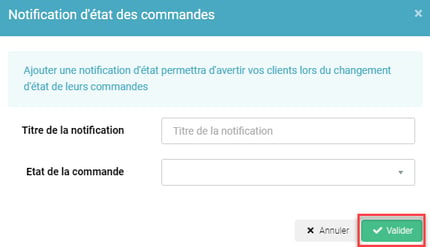
Example : You want to send a notification every time an order changes to "Prepared" status.
-
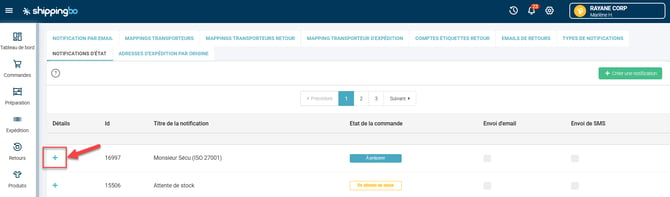
To view the details of the created notification, click on the "+"to the left of the latter:
5. Configure and customize the notification
5.1 Configure the notification
a. Setting the conditions
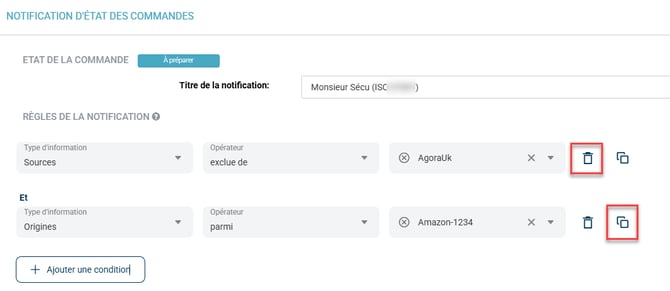
On the page that opens, in the section NOTIFICATION RULESclick on Add a condition to define the conditions for sending the notification:
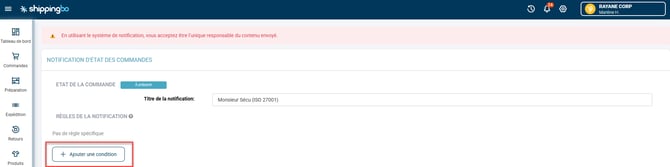
For each condition, specify the information type, the operator, and the target. You can also delete or duplicate conditions:
💡 Tip:
To validate a value in the include/exclude fields, you must click the key. Entrance from your keyboard.
💠Noticed :
The notification conditions are combined with a relationship ANDTherefore, the notification will only be triggered for orders that meet all the conditions listed in this section. NOTIFICATION RULES.
Specifically regarding the conditions for the carrier service, there are two possible scenarios:
-
If the notification is sent Before Order shipment: Enter the full name of the carrier indicated inCalculated carrierin the command (this field is only filled with a functional carrier mapping).
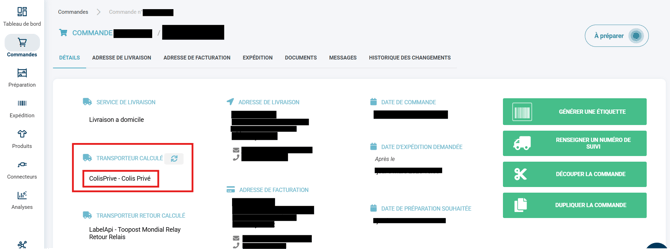
➡️ Here, it should therefore be indicated as “ColisPrive - Colis Privé”.
-
If the notification is sent After Order shipment:Enter the displayed name in the fieldCarrierin the tabShippingof the order.
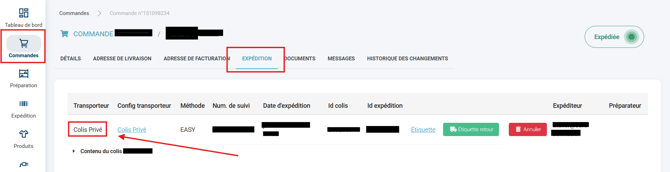
➡️ Here, you should therefore indicate “Colis Privé”.
🚩 Special case:
For carriers Colissimo And Simple Letter, if the notification is sent After When shipping the order, you must specify "The Post Office"
b. Test a notification
Once your notification is set up and activated, the simplest way to test it is to create a test order, including your email address in the delivery address of this test order:
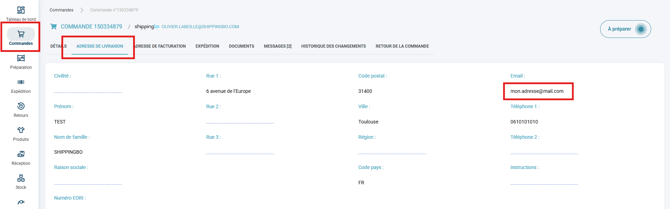
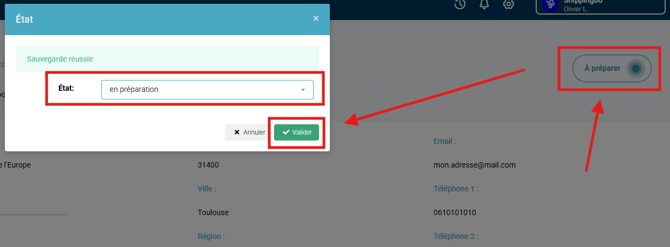
You can then change the order to the state that triggers the notification (here, the status In preparation) :
c. Archive a notification
It is not possible to permanently delete a status notification, however it is possible to...archive.
- To archive a status notification, you must first disable notification sending by unchecking the boxes. Sending email And Sending SMS messages :

- Next, rename the notification by adding the suffix -ARCHIVE to the title to quickly view your disabled notifications:

5.2 Customizing the status notification
📢 Warning:
Customizing a status notification is only available under two conditions:
- A SMTP must be logged into your Shippingbo account, more information here.
- The user performing the manipulations must have the two-factor authentication enabledmore information here.
You are responsible for the content of the personalized notifications sent to your customers.
-
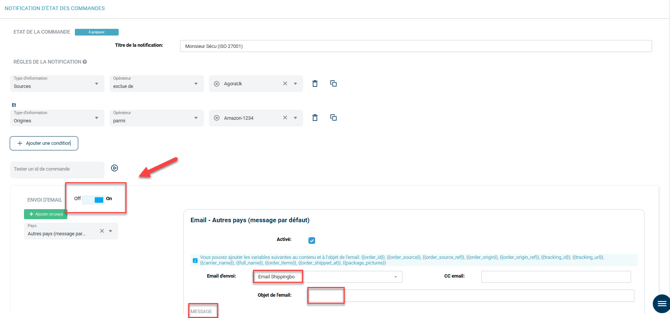
To activate the notification, click the button to switch it on OnThen, enter the subject, the sending email address, and the email content:
-
- Email subject :The subject of the email.
📢 Warning:
Without SMTP configuration or a user with two-factor authentication enabled, the field Email subject is greyed out, cannot be modified.
-
- Sending email:If you wish to include an email address in the copy field.
- Banner URL:You can choose a file in PNG or JPEG format, for example a logo or banner that will appear at the top of your email.
- Message :the content of the email.
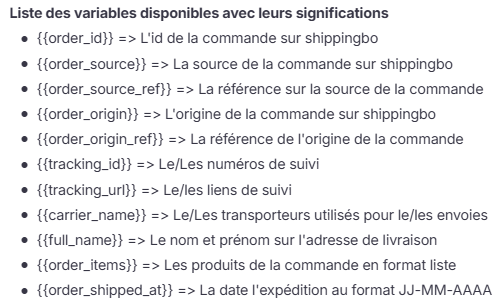
The variables will be replaced by the values they designate in the body of the email.
For example, suppose that in the body of the status notification, it says "Here is the order .":
➡️ Order 140454344 will trigger a notification to the customer, with the following in the email body: "Here is order 140454344."
-
Once your notification is configured, you need to click on the button Save the notification bottom left.
-
Your notification will appear in the menu Status notificationYou can return to it at any time to modify its content or to deactivate it.
If the notification is enabled, then it will be automatically sent to your customers when your orders switch to the corresponding state in Shippingbo.

📢 Warning:
Some platforms like Amazon sometimes send emails with incorrect delivery addresses.
➡️ Check that the sending address is correct to avoid any problems.
💠Note:
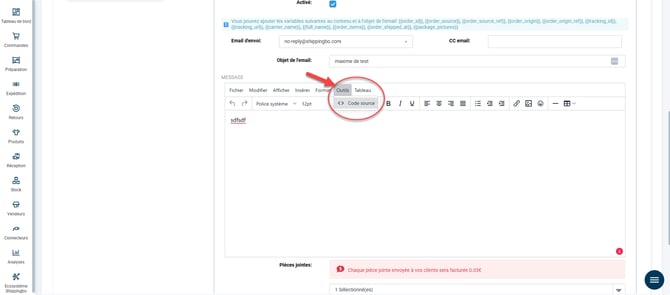
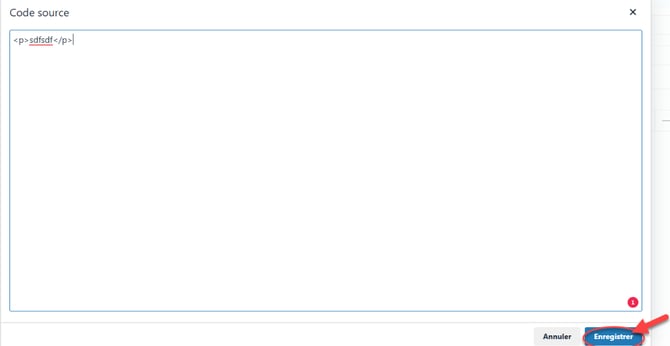
If you are using a server SMTP For sending your notifications, you have the option to integrate HTML code for advanced customization, as well as CSS to ensure a responsive layout, adapted to phones and email clients.
To do this, in the body of the email, click on Tools -> Source code :
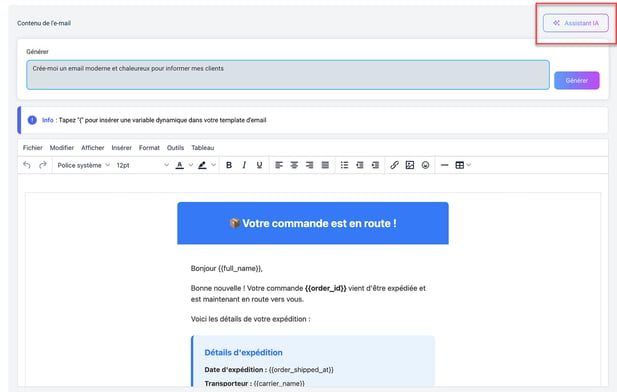
You can ask our AI assistant for help writing your status notifications by clicking on AI Assistant :
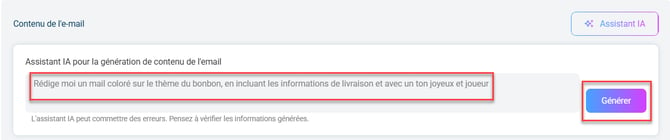
Enter the message you want to create using the AI assistant in the notification here, then click on Generate :
6. Create a notification per country
You can customize the notification for different shipping countries:
- Open the notification that was created and enable email sending. Click on Add a country:

- Choose a country from the list and confirm:
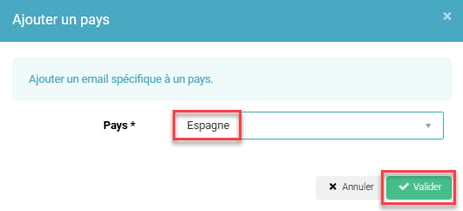
- Next, customize the notification for this country, activate it, and save it:
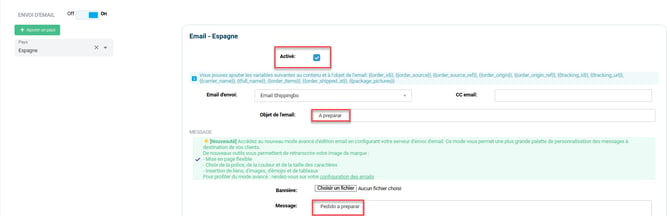
Example :
You can send one specific notification for orders destined for France and another for those destined for Germany.
Repeat the same steps for all countries for which you want to create a status notification..
7. Attach a document: Invoice, Shipping slip or Packing list
To send one or more attachments (such as invoices, packing lists, or delivery notes) via the notification, you can choose the(s) ofDocument(s) required from the dropdown list below the Email Content block:
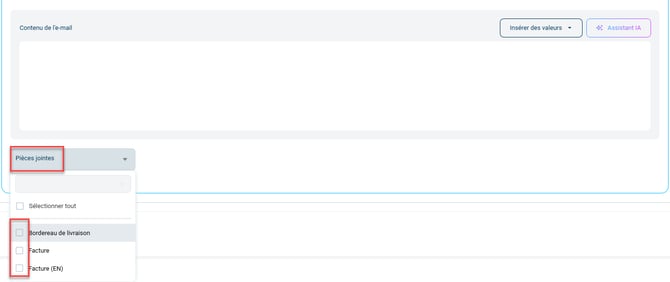
📢 Warning:
To send invoices automatically via status notification, activation of The "Invoice" option is required.Contact your Shippingbo account manager to activate it.
💠Note:
To send the packing list, create a dedicated notification by selecting the "Packing list generated" :
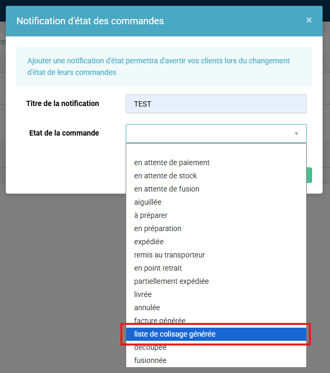
You can then select the attachment. Packing list in the notification: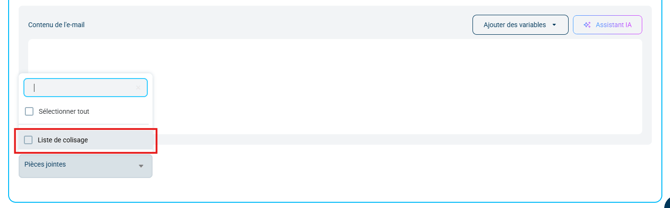
⚒️ Recommendation:
Before fully using the functionality described in this tutorial, it is strongly recommended to performa testing phasefollowing your own parameters to verify that the result meets your expectations. The remaining customerfully responsibleThese tests, based on actions performed on the Shippingbo account, are essential to ensure the tool can be used with complete peace of mind.
To go further 🛫:
- Configure a notification email address
- Configure a Gmail SMTP server on Shippingbo
Contact us 📬:
Questions about this feature? Feel free to write to us. here so that we can answer your questions.