.png?width=210&height=40&name=bleu%20et%20gris_Sigle+logo%20SBO%20(4).png)
It allows you, when you receive a returned order in Shippingbo, to register the return and quickly restock the returned products using your PDA.
This first part will explain how to register the return of products from the returned order via your PDA.
- Enhanced traceability : Accurate history of returned items, with reasons and statuses directly entered on the PDA.
- Real-time update Stock is automatically adjusted upon validation of the return in the system.
- Error reduction Instant identification of returned products, avoiding confusion or duplicates.
1. Create the return in Shippingbo
Step 1:On the Shippingbo interface, go to your order details to create the return: 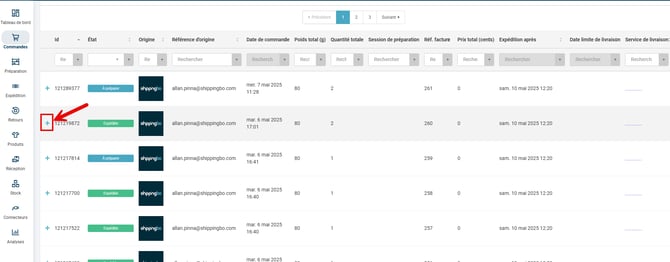
Step 2:In the Return tab of the order, click Add.
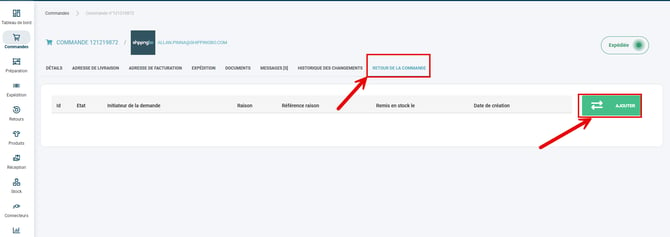
Step 3:Fill in the required fields and then click on Validate.
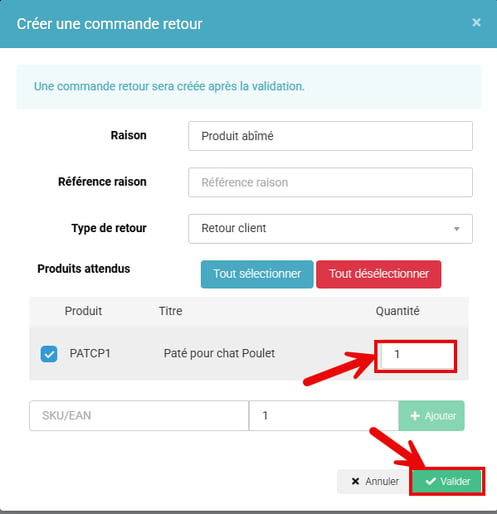
💠Note:
If you manage reasons, you can predefine reasons for return management via the following tutorial: Assigning reasons in Shippingbo.
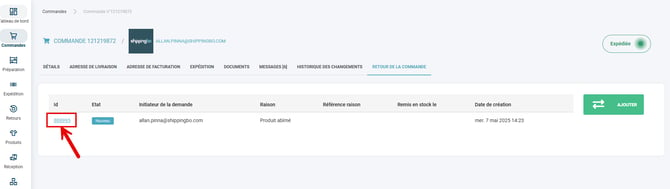
The return is created in the order and you can click on the ID of this return to go to it (or in the Return Management menu of the sidebar).
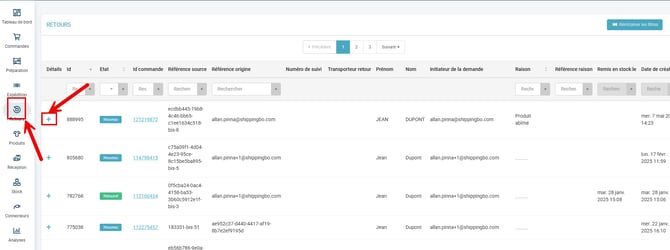
2. Receive your return on the PDA
You will find a barcode in the top right corner of your return, corresponding to the return ID.
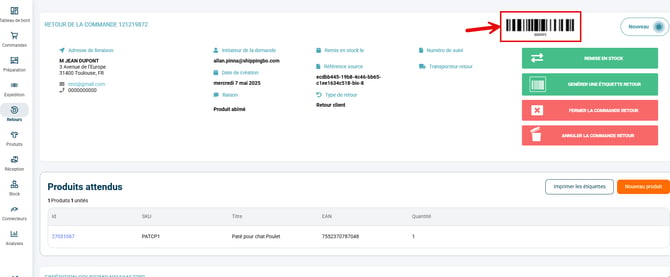
💠Note:
There are also other ways to identify your return: via the package ID in the shipping tab of your order, or via the package number visible on the return label of your order. For example, for Colissimo: 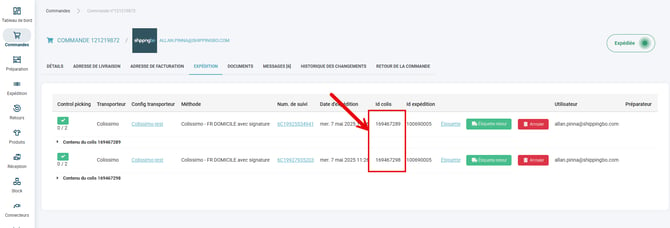
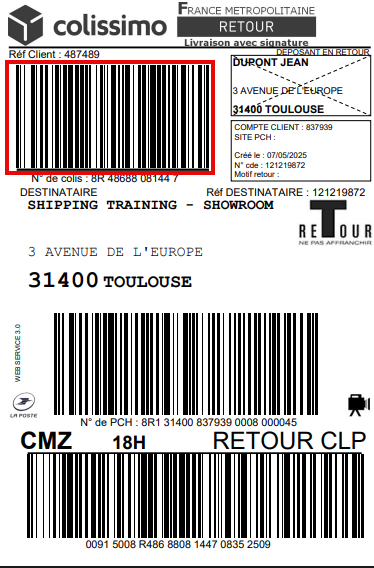
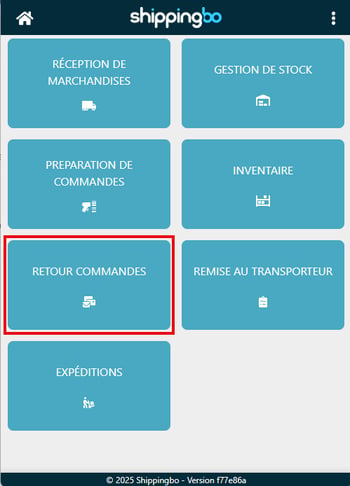
Step 1:On your PDAGo to the Back to Commands menu.
Step 2:Then in the Returned Products Control menu
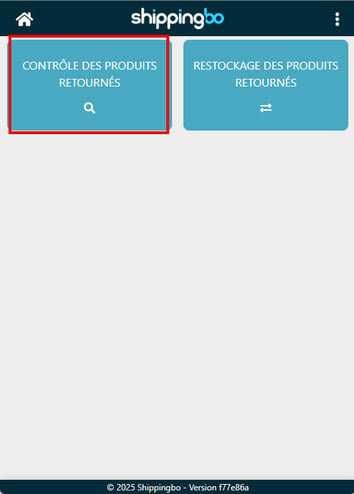
📢Warning:
For these menus to be usable, you must first create defined locations for the returns:Configure a usage for a location.
Step 3:Scan your return ID (barcode shown previously)
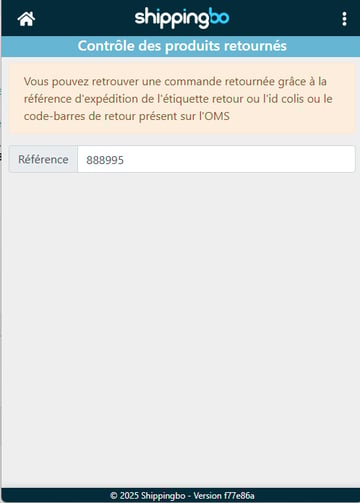
The PDA displays in the Expected tab all the products of the order and in the Processed tab the products that you have restocked or not restocked for various reasons: sent for repair, recycled, thrown away, etc.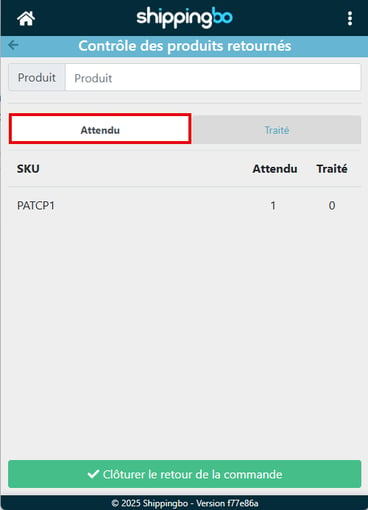
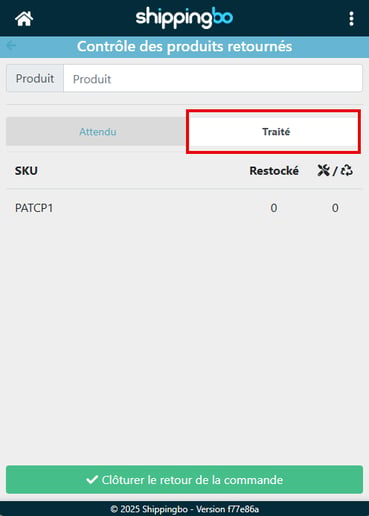
Step 4:Scan your returned product
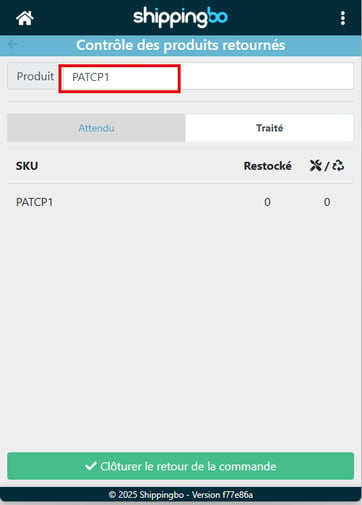
💠Note:
If you manage serial numbers and the returned product is configured for serial number management, you will be asked to scan this serial number for each quantity of the returned product.
You will therefore need to make the return by scanning the product quantity by quantity.
Step 5:If the product is restockable, scan the name of the return location. If the product is not restockable, click the "Not restockable" button.
In the interface, the return will be clearly marked as Returned, and you will be able to view the details of the returned products.
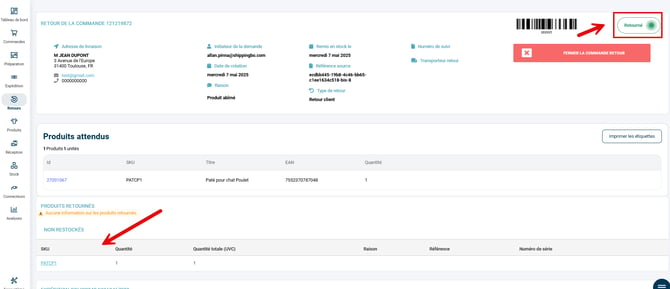
The products are placed in the returns area here. They have not yet been restocked. To restock these products, please refer to the linked tutorial: Restocking returned products using a PDA.
💠Note:
You can use the same location as a Return Bin to process several different returns.
💠Note:
If you start the restocking process from the interface, you will not be able to continue it on the PDA because at the end of the restocking process in the interface, the return is marked Returned and the return ID is no longer valid on the PDA.
3. Retrieve your actions in an export
You will be able to find the products not restocked during your reception in the menu:Configurations -> File management -> Exports -> Products not restocked upon return.
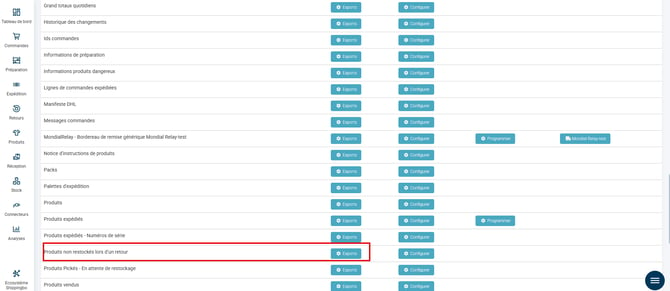
You will find the following information there: ID of returned orders, return ID, ID and SKU of returned products, reasons, users who registered the return and the date the return was created.
If you are using a Multi-Shippingbo system, it is possible to create a return from the OMS and propagate it to the WMS so that it can be processed directly there (see: Managing returns in Multi-Shippingbo).
⚒️ Recommendation:
Before fully using the functionality described in this tutorial, it is strongly recommended to performa testing phasefollowing your own parameters to verify that the result meets your expectations. The remaining customerfully responsibleThese tests, based on actions performed on the Shippingbo account, are essential to ensure the tool can be used with complete peace of mind.
FAQ ❔:
No related FAQs at the moment.
Contact us 📬:
Questions about this feature? Feel free to write to us.hereso that we can answer your questions.