.png?width=210&height=40&name=bleu%20et%20gris_Sigle+logo%20SBO%20(4).png)
1. Retrieve login information
Step 1:Appointmentyou on your Prestashop back office.
Step 2:In the menu on the left, go to the "Advanced settings" section, then click on "Web service" (or "Webservices", depending on the Prestashop version):
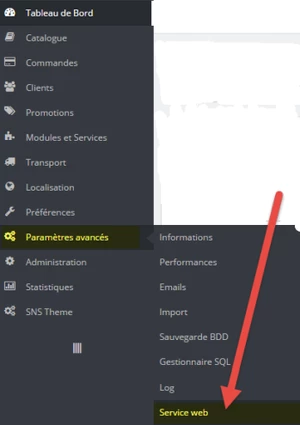
Step 3:In "Advanced settings", enable the web service and PHP's CGI mode by clicking "Yes" as shown below.
Be sure to click "Save" once the change has been made.

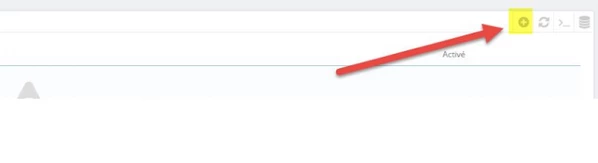
Step 4:In "Web Service", click on the icon (+allowing you to add a web service.
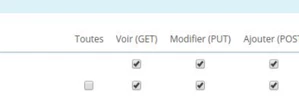
Step 5:Check all the boxes in the GET, PUT and POST columns:
Step 6:Click on "Generate" in the top right corner to generate a key (this will appear once the operation is completed):

Step 7:Once the key appears, copy it to keep it safe and then click "Save" at the bottom right of the page.

🚩Special case:
If you are using a network system like CloudflarePlease allow Shippingbo IPs on this network in addition to your Prestashop sales source:
- 3.74.16.63
- 3.74.39.181
- 3.74.48.178
- 52.18.227.53
- 52.213.188.24
- 52.48.188.143
2. Create an external service in Shippingbo
💡 Tip:
Discover our connection process to follow in our tutorialhere.
🚩 Special case:
If you are moving from a pre-production account to a production account, you will need to create a new Prestashop Connector in Shippingbo.
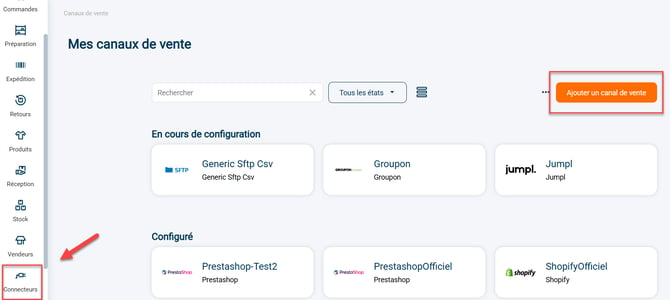
Step 1:Go to your Shippingbo interface to create your external service in the menu Configurations -> External Services -> Click on "Add a sales channel":
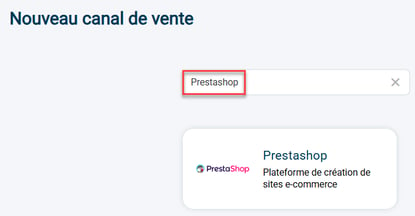
Step 2:Search for "Prestashop" in the search bar, then click on the Prestashop tab that appears:
Step 3:Your connector opens and the first category appears:

1) The stylus on the right of Prestashop allows you to change the name of your connector.
2) The "View help" button redirects you to this tutorial.
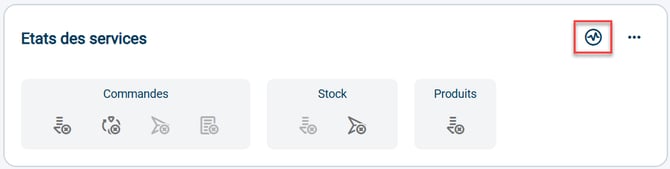
3) The graphic icon allows you to verify the validity of the connection between Shippingbo and your Prestashop store.
4) The blockOrdersinforms you about the functionalities that are enabled, disabled or unavailable between your Shippingbo account and your Prestashop store at the order level: order retrieval, order closing, order sending, order acceptor.
5) The blockStockinforms you about the features that are enabled, disabled or unavailable between your Shippingbo account and your Prestashop store at the stock level: stock retrieval, stock sending.
💬 Good to know:
The color code for the icons is as follows:
 - Active features are shown in blue
 - Dark grey indicates features that are disabled but available
 - Features shown in light grey are unavailable
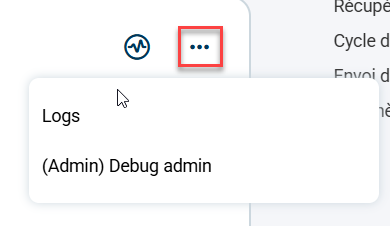
Step 4:By clicking on the 3 small dots to the right of the graphic icon, you will be able to access calls made with this service:
3. Connect Prestashop to Shippingbo
A minimum of 3 pieces of information are required to connect Prestashop to your Shippingbo account:
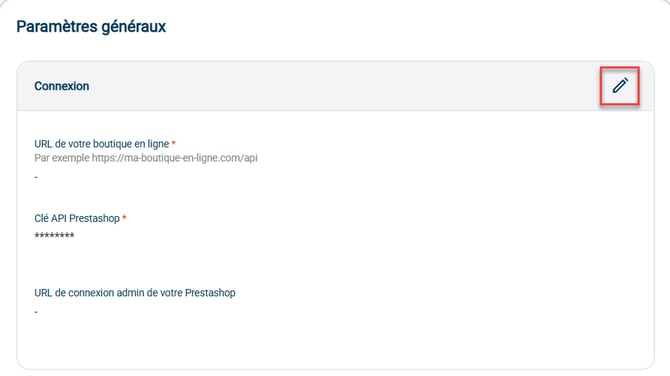
Step 1:First, you must enter the following information in the "General Settings" section:
- Host
- Prestashop API key
- admin login URL
🚩 Special Case:
If you wish to connect your Prestashop toMulti-storePlease follow these steps:
1. Create a second API key filtered by store
2. Create a second Prestashop connector in Shippingbo to connect the second store
3. Activate the feeds, with the exception of the stock feed which should only be activated ona connector.
3.2: Next, fill in the remaining information you need in the block. Order retrieval
To activate the Order retrievalClick on the arrow to the right of the category:

The mapping oforder status allows you to define in which state Shippingbo should retrieve the order, whether it is in the context of retrieving the Prestashop order on Shippingbo, or updating the order status on Prestashop to Shippingbo.
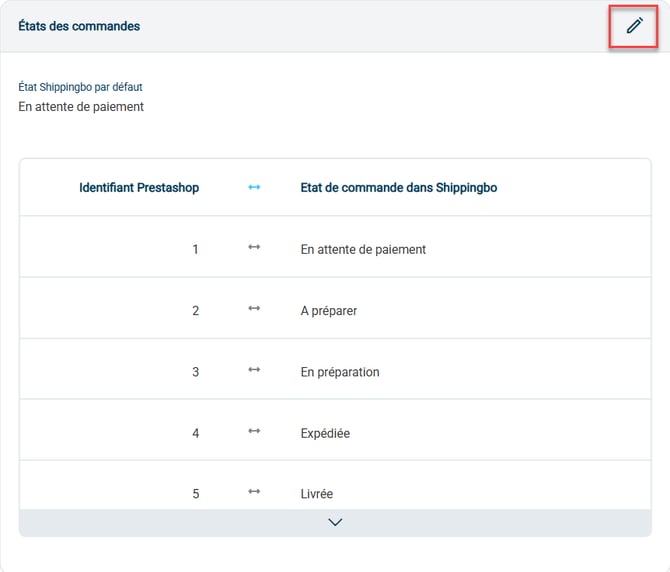
The Prestashop IDs for order statuses can be found in your Prestashop back office settings.
3.3 : Retrieving relay point numbers
If you offer delivery to a collection point, regardless of the carrier, the installation of the relay point number retrieval module East necessary.
Please refer to our dedicated tutorial for this installation. here.
3.4Activate the Order lifecycle (optional)
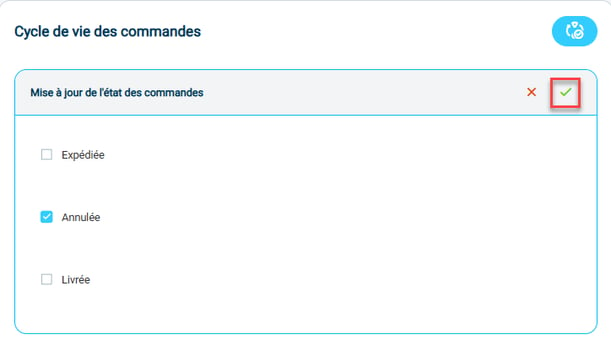
In order for Shippingbo to automatically send order statuses to your Woocommerce store when they change to "Shipped", "Cancelled" or "Delivered", you must enable the order lifecycle feature.
To do this, select the desired command state(s), thenconfirm :
3.5Configure theShipment of stocks (optional)
L'Shipment of stocksActivated by clicking the dedicated button:

The call ofShipment of stocks The transfer from Shippingbo to Prestashop is immediate as soon as a stock variation is made on a product, provided that this product shares the same SKU on Shippingbo and Prestashop.
You can adjust the stock value sent according to the specifics of your business.
If you use the Types of stockYou can configure the exclusive distribution of a single type of stock to Prestashop in the field Stock type to publish on the service.

By default this field is empty, so all stock types are sent to Prestashop.
3.6 Next, fill in the remaining information you need in the Advanced settings.
- Here you will find the settings for the time zone of your Prestashop

- And if you wish to remove this connector, you will find the dedicated button here:

⚒️ Framework and responsibilities:
Before fully using the functionality described in this tutorial, it is strongly recommended to performa testing phasefollowing your own parameters to verify that the result meets your expectations. The remaining customerfully responsible These tests, which are essential for ensuring the tool can be used with complete peace of mind, are crucial for the actions carried out on the Shippingbo account.
⚒️ Framework and responsibilities:
Only direct connections from sales channels allow Shippingbo toguarantee control of flowsWhen orders are not retrieved via an official Shippingbo connector, but are routed through a third-party tool (intermediate CMS, external connector, FTP, manual or automated import), Shippingbo cannot guarantee the integrity, reliability or completeness of the transmitted data.
This data may be modified, truncated, reformatted or duplicated before being received in Shippingbo, leading to processing errors, duplicate orders, status inconsistencies, label blocks, carrier or customs anomalies, and a degradation of the final customer experience.
In this context, Shippingbois unable to investigate or correct anomalies issues originating from the third-party system. Any anomaly related to upstream data is outside the scope of Shippingbo's responsibility (more information on the scope of support). hereThese investigations can only be carried out as part of a specific service and will be subject to a charge.
For all these reasons, it is highly recommended to connect your sales channels directly to Shippingbo via the official connectors.