.png?width=210&height=40&name=bleu%20et%20gris_Sigle+logo%20SBO%20(4).png)
For example, in the case where the person handling stock entry does not know where the product is located in the warehouse at the time of receipt.
- Error reduction : Increased accuracy thanks to product scanning with the PDA.
- Speed: Simplified operation via the use of the PDA and reflected in real time on the stock status
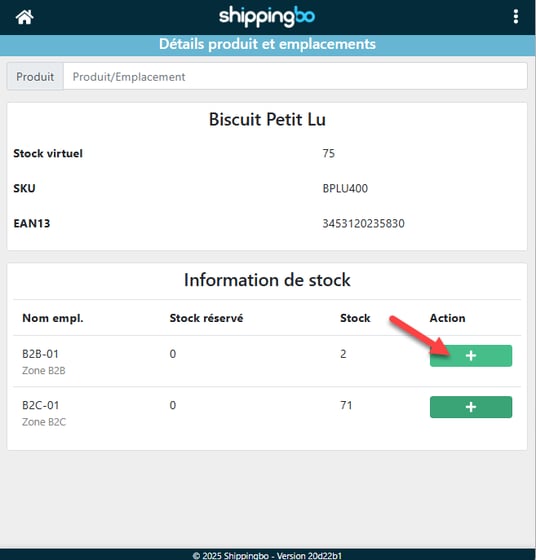
View available product locations
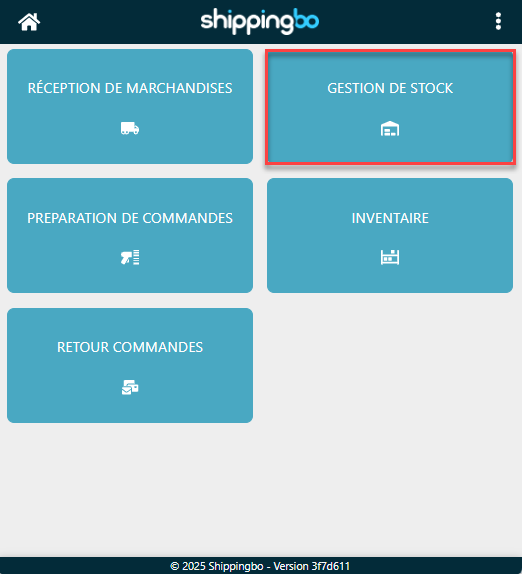
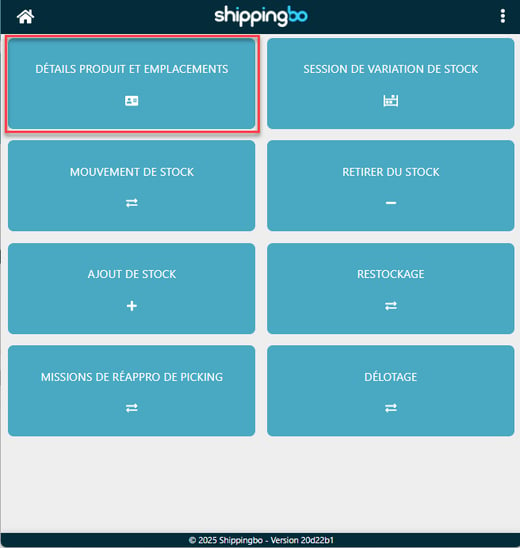
Step 1: Go to Inventory Management and enter the module Product Details and Locations
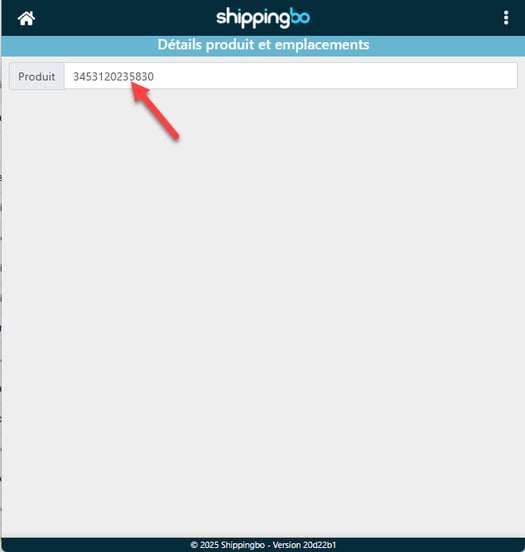
Step 2:Scan the barcode of your product
This gives you an overview of the locations where your product is located.
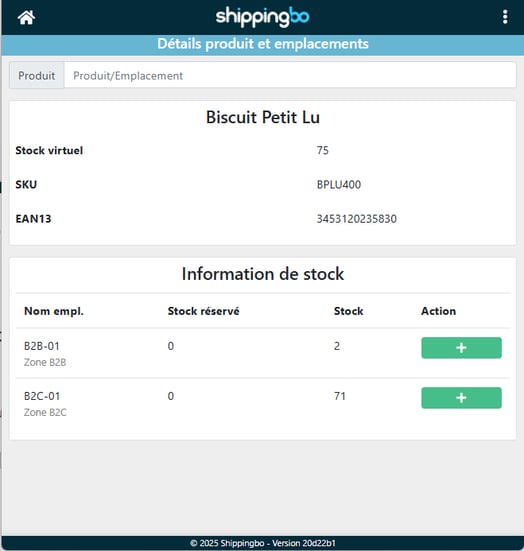
Add stock to the desired location
Step 1:Click on an Action button to add your product to this location:
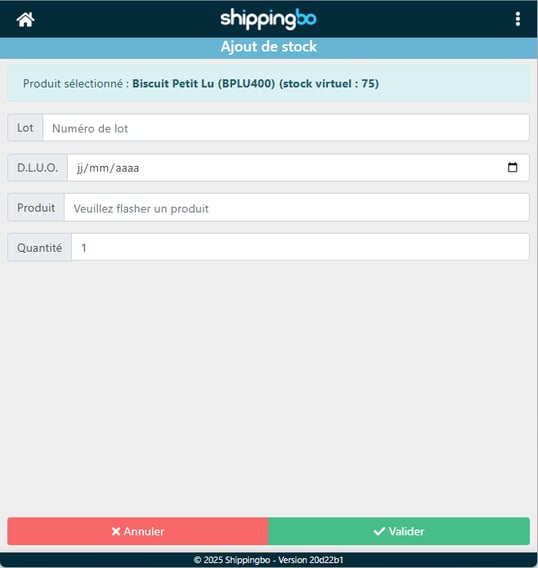
Step 2: This takes you back to the Add Stock menu, so you can re-flash the quantity you want to add or manually modify the quantity:
Contact us 📬:
Any questions about this feature?
Feel free to write to us here so that we can answer your questions.