.png?width=210&height=40&name=bleu%20et%20gris_Sigle+logo%20SBO%20(4).png)
Benefits of the feature ✨
- Workflow optimization : Facilitate the identification and isolation of orders with custom tags.
- Process automation Save time by automating tag assignment according to specific rules.
- Flexibility : Create as many rulebooks as necessary to meet your specific operational needs.
1. Prerequisites
- This feature is available from the Premium+ packageTo activate it on your account, contact our support team. here.
2. How does Tag Mapping work?
Tag mapping allows you to automatically create and apply tags to your orders based on predefined rules. This makes it easier to identify and manage orders according to your needs.
2.1 Create a Tag
- Go to the menu Configurations → Orders → Tag Mapping:
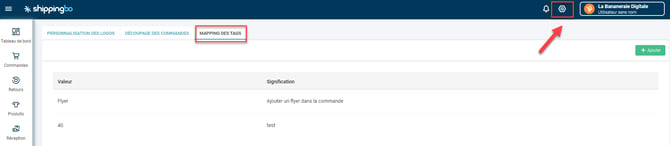
- Click the button Add To create a new tag, give your tag a name in the field. Value And, if desired, provide a meaning to help you remember it:
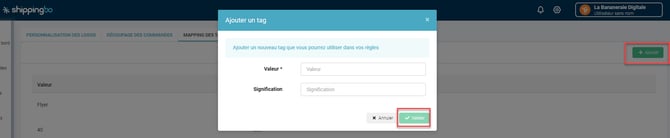
Once created, your tag will appear in a table with the option to edit it at any time by clicking on the corresponding pencil.
Example :
You create a tag called "Express Shipping" to identify orders requiring priority shipping.
💬 Good to know:
The value of a tag is limited to 60 characters and its significance to 256 characters.
2.2 Create a rulebook
To have your tags automatically applied, you need to define some rulebooksHere's how to proceed:
- Click on Add opposite "Rule type":
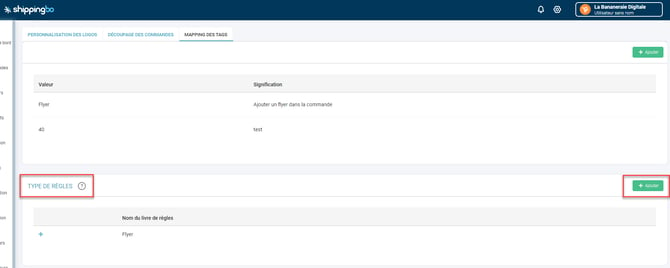
- Give your rulebook a name. Confirm your choice:
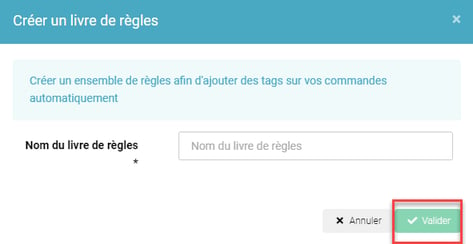
Example : You can create a rulebook named "Logistics" to mark large orders, and another named "Gift Certificate" for those including a gift certificate.
2.3 Create allocation rules
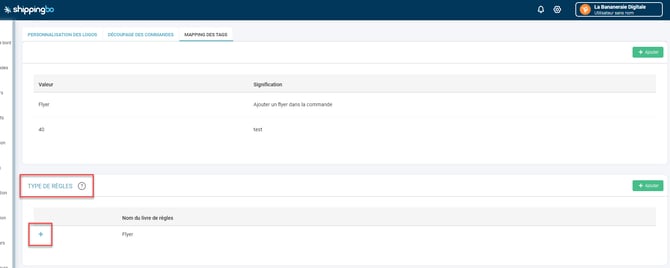
- Once the rulebook is created, open it by clicking on the "+" on the left:
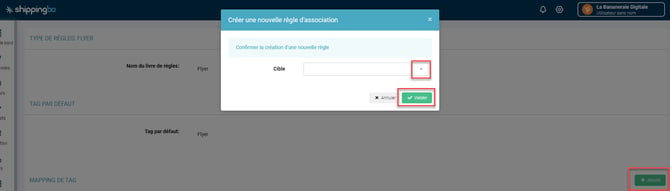
- Click on AddThen select the Tag that your rule will reference from the dropdown list, then To validate :
- Next, add a condition to determine when the tag should be applied:
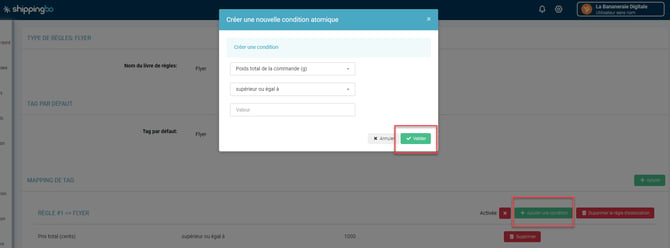
Example : You create a rule where the "Heavy Shipping" tag applies to all orders weighing more than 1 kg.
⭐ Key point:
Don't forget to activate your rules for them to start applying to orders in Shippingbo:
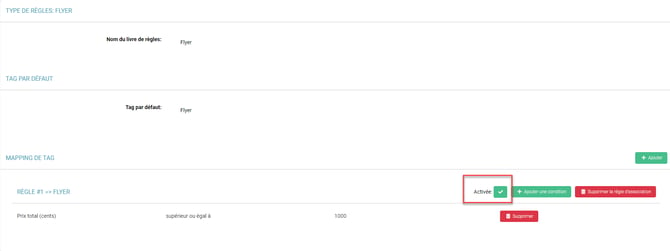
➡️ Once the tag mapping is configured, the tag will be assigned instantly upon creation/retrieval of the order on Shippingbo.
💬 Good to know:
If tags are added after orders are received in Shippingbo, you must contact our support team so that the tags can be recalculated. This recalculation can only be performed by the support team (via the button). Recalculate the tag mapping of the commands In Configurations > Orders > tab Tag mapping))).
- To test your carrier mapping, you can enter the Shippingbo order ID of your choice and identify which rule highlighted in green is activated, to verify that your mapping works as expected.

3. Enable and configure Tag Mapping
3.1 Enable Tag Mapping
Activating the Tag mapping is done via Shippingbo support. You can request tag mapping activation. here.
3.2 Add a default tag
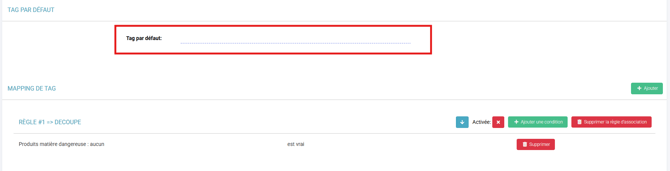
If you wish to apply a default tag to all commands that do not match any rule, you can define this tag in the rulebook:
3.3 Tag Propagation in Multi-Shipping Box
It is possible to enable the propagation of manual tags in Multi-Shippingbo.
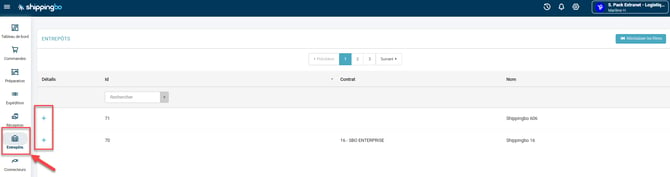
To do this, go to your account. WHOmenu Warehouses -> Enter the details of the warehouse for which you want to enable tag propagation:
Then, check the option Propagate manual tags :

⚒️ Framework and responsibilities:
Before fully using the functionality described in this tutorial, it is strongly recommended to performa testing phasefollowing your own parameters to verify that the result meets your expectations. The remaining customerfully responsibleThese tests, based on actions performed on the Shippingbo account, are essential to ensure the tool can be used with complete peace of mind.
To go further 🛫
Contact us 📬
Questions about this feature? Feel free to write to us. here so that we can answer your questions.